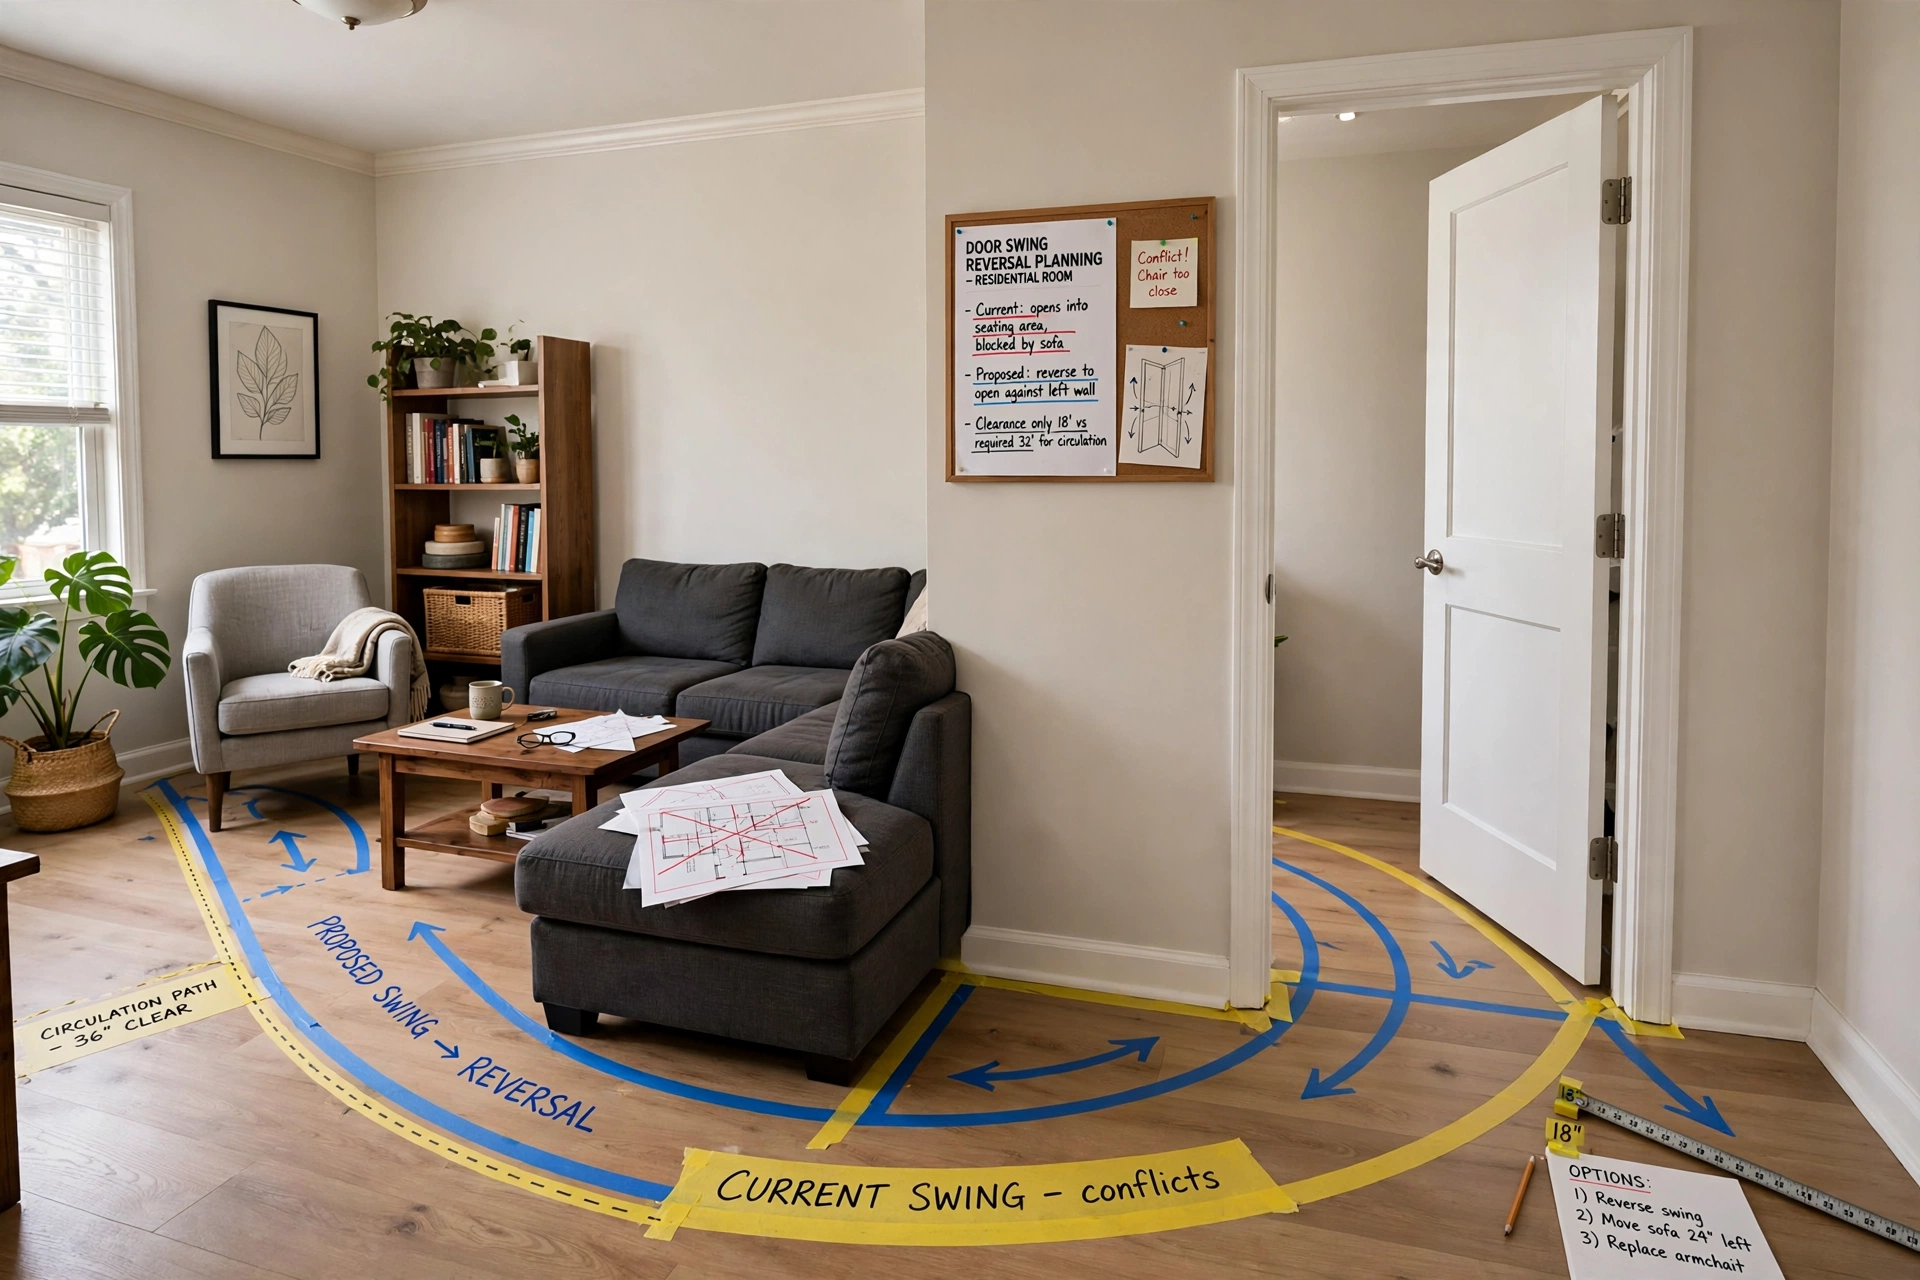
Interior Door Swing Reversal Planning for Residential Rooms With Conflicting Furniture and Circulation Paths
A door that clips the corner of a dresser, traps you behind a desk chair, or blocks the hallway every time it opens is not a minor annoyance. It quietly steals usable floor space, forces awkward furniture placement, and turns a room's circulation into a daily obstacle course. Reversing the swing of an interior door is one of the cheapest structural-feeling fixes a homeowner can make, yet it is also one of the easiest to get wrong, because the new swing can create a fresh set of collisions on the other side of the wall.
In short: reversing an interior door swing means moving the hinges to the opposite jamb so the door opens from the other side, or flipping it from in-swing to out-swing, to free the space the old arc occupied. The job usually takes a few hours and basic tools, but the planning matters more than the rehang. Before you remove a single hinge pin, map the full arc of the proposed swing, check it against every piece of furniture and walking path on both sides of the doorway, and confirm the new swing does not clash with light switches, a second door, or hallway traffic.
Start With the Arc, Not the Furniture: How to Map a Door Swing Collision
Every interior door sweeps a quarter-circle as it opens, and that arc is the real footprint of the door. A standard 30-inch interior door sweeps a 30-inch radius, roughly 5 square feet of floor that nothing else can occupy. Most swing conflicts happen because that arc was never drawn on the floor plan. People place a bed, wardrobe, or desk where the room looks empty, then discover the door cannot open past 70 degrees.
Mapping the collision takes about 15 minutes and prevents most reversal mistakes. Open the door fully and mark its arc on the floor with painter's tape, then mark the proposed new swing in a different color. Walk both arcs. Sit in the desk chair, pull out the dresser drawers, and open the wardrobe while standing inside each arc. Check for three things: physical contact between the door and furniture, circulation paths narrowed below a comfortable width, and daily tasks that become awkward, such as making a bed or carrying laundry through the doorway.
- Walkway test: A main walkway should stay 30 to 36 inches wide with the door open, not just while it is closed.
- Storage test: Drawer and wardrobe fronts need full pull-out depth plus standing room; an arc overlapping that zone makes the storage unusable.
- Full-open test: The door should open a full 90 degrees without touching furniture, thick rug edges, or baseboard heaters.
- Both-sides test: Check both sides of the wall. A swing that frees the bedroom may block a hallway, a closet door, or the bathroom door opposite.
Left-Hand, Right-Hand, In-Swing, Out-Swing: Decoding Which Reversal Actually Solves Your Problem
Door people use two separate terms that homeowners often confuse. Handing describes which side the hinges sit on when you face the door, while swing direction describes whether the door opens into the room or out into the hall. Reversing the handing and reversing the swing direction are different jobs, and choosing the wrong one wastes an afternoon.
Changing only the handing, for example from left-hand in-swing to right-hand in-swing, keeps the door opening into the same room from the opposite side. Hinges and strike move to the opposite jamb, old mortises get filled, and the door stop usually stays. It solves collisions with furniture on one side of the room. Changing the swing direction is bigger work, since the stop, hinges, and sometimes trim must move, and the door may block hallway traffic. For most furniture conflicts, a handing change alone is enough.
Furniture First or Door First? Replanning the Room Around the New Swing
A reversed swing is only as good as the furniture plan that goes with it. The most common post-reversal complaint is not that the door still hits something, but that the room now feels wrong: the bed moved to a wall with no outlet, the desk faces a blank corner, or the only comfortable walking path cuts diagonally across the room. Solve the room and the door together, not one after the other.
Place the largest piece first, usually the bed or the desk. Draw the new door arc on your floor plan, then place the large furniture completely outside it, with its own clearance zone intact: a bed needs about 30 inches on the side you make it from, and an 18-inch-deep dresser needs roughly 36 inches of pull-out space in front of it. Once the big piece is settled, secondary pieces fit around it, and main walking paths should stay 30 to 36 inches wide.
For rooms with two doors, such as a bedroom with an en-suite bathroom, stagger the swings or choose opposite handings so the arcs sweep away from each other instead of colliding.
The Rehang Itself: Reversing an Interior Door Slab Step by Step
Once the plan is settled, the physical job is straightforward for a confident DIYer and typically takes two to four hours, including filling and painting. You will need a screwdriver or drill, a hammer and chisel or a router, a tape measure, a pencil, wood filler, sandpaper, and paint for touch-ups.
Take the door down. Remove the hinge pins, lift the door off the frame, set it on a flat surface hinge edge up, and remove the hinges and latch hardware.
Strip the old side. Unscrew the hinges and strike plate from the jamb. Fill the old mortises and screw holes with wood filler, let it cure, and sand it flush.
Mark the new mortises. Hold the door in the new position on shims, with hinges reconnected to the door leaf, and trace the hinge outlines onto the opposite jamb to transfer exact positions.
Cut and fit the hinges. Chisel or rout the new mortises to the depth of the hinge leaf, drill pilot holes, and screw the hinges in with pins facing the in-swing side.
Set the latch and strike. Rehang the door, close it, and mark where the latch barrel meets the jamb. Drill the latch recess, chisel the strike mortise, and install the strike plate.
Test, adjust, and finish. Test the door through several full open-and-close cycles. Check for sticking, squeaking, and latch engagement, then adjust hinge screws or lightly plane a binding edge before touching up paint.
Two details separate a clean job from a sloppy one. Always drill pilot holes for hinge screws, especially in older jambs, because splitting the jamb turns a small job into a repair. Also check the door stop: on a handing-only reversal it usually stays, but on an in-swing to out-swing change it must move to the opposite side of the jamb.
Reversal Costs, Tools, and Time: A Realistic Budget for a DIY Door Rehang
Costs for a door swing reversal are modest compared with most home improvement work, but they vary with how much finishing the jamb needs. The figures below are estimates for a typical interior door, and local prices will shift them. A DIY reversal using the existing slab and hardware is mainly a materials job, while hiring a carpenter adds labor but buys a cleaner mortise and finish.
Budget a full afternoon even if the job looks like two hours, since filler and paint need curing and drying time. If the jamb is damaged or the frame is out of square, get a quote before starting.
Door Swing Reversals That Belong With a Carpenter, Not a Weekend DIYer
Most interior door reversals are safe DIY territory, but a few situations call for a professional. Fire-rated doors between a garage and living space, doors in fire-separation walls, and doors forming part of a required egress path may be governed by local building codes, and changing their swing can affect compliance. Doors in older homes may also hide lead paint in the frame, which should never be sanded without proper precautions.
Call a carpenter when the frame is out of square or damaged, when an out-swing conversion requires moving the stop and trim, or when the door is a heavy solid-core or glass slab. A professional also spots damaged framing that cannot hold screws, and the cost is less than repairing a split jamb or a code violation found during a future sale.
If Reversing Is Not Enough: Pocket, Barn, and Bifold Alternatives for Tight Rooms
Sometimes no swing direction works. A tiny bathroom, a narrow hallway closet, or a room where every wall already holds furniture may have no free arc at all. In that case, replacing the swing door rather than reversing it is the honest answer. A pocket door slides into the wall cavity and removes the arc entirely, but it needs an open, stud-free wall section and is best installed during a remodel. A barn door slides along a wall-mounted track and needs clear wall space beside the opening. Bifold doors fold in half and use roughly half the arc of a swing door, making them a good fit for closets and laundry nooks.
Final Verdict: Is Reversing Your Interior Door Swing Worth the Disruption?
For most rooms with a genuine furniture or circulation clash, yes. A handing reversal is a low-cost, half-day project that can free several square feet of usable floor, rescue a dresser or desk placement, and make a cramped room feel noticeably larger without moving a single wall. The key is the planning step: tape both arcs on the floor, test every furniture piece and walking path against the new swing, and check the other side of the wall before you commit.
Interior Door Swing Reversal FAQs: Handing, Clearances, and Costs
Can I reverse an interior door swing without buying a new door?
In most cases, yes. A handing reversal reuses the same slab, hinges, and latch, needing only wood filler, paint, and possibly new screws.
How much clearance does a reversed interior door need to swing freely?
A reversed door needs its full arc clear: a 30-inch door sweeps a 30-inch radius and should open a full 90 degrees without touching furniture or rugs. Keep main walkways 30 to 36 inches wide with the door open.
Is changing a door from in-swing to out-swing harder than changing its handing?
Yes. A handing change only moves hinges and the strike, while an in-swing to out-swing change also moves the door stop and trim, and the door then swings into a hallway where it can block traffic. Check local code rules before converting a swing direction.
Will reversing my bedroom door swing affect privacy or noise?
A handing-only reversal should not change privacy or noise, since the door, frame, and seal stay the same. Problems appear when the stop is moved incorrectly or the latch does not engage fully, leaving a gap.
Can two doors in the same hallway be reversed so they stop hitting each other?
Often, yes. Reversing the handing of one door, or both, can make their arcs sweep away from each other instead of colliding. Map both arcs with painter's tape first, and if no combination clears the clash, consider a sliding or bifold door for one opening.
How long does a DIY interior door swing reversal take?
Plan on two to four hours of hands-on work plus curing and drying time for filler and paint, so a full afternoon is realistic. Rushing the mortise or latch alignment is the most common cause of a door that sticks or rattles afterward.
Should I hire a carpenter to reverse an interior door swing?
A confident DIYer can handle a standard handing reversal, but hire a carpenter for fire-rated doors, damaged frames, heavy solid-core or glass doors, or any code-regulated egress path. Professional labor typically costs an estimated $150 to $350.